يمكن إضافة العديد من العناصر التابعة الي هذا المخطط والتحكم في موضعهم علي الشاشة عن طريقة خاصية الجاذبية (gravity)
خصائص التخطيط الاطاري :-
1. android:id
خاصية المعرف المفيد التي تشير الي التخطيط الاطاري في ملف الجافا R.java
2. android:foreground
هي خاصية مسؤولة عن رسم المحتوي وقد تكون قيمة الخاصية قيمة لونية
<FrameLayout
    xmlns:android="http://schemas.android.com/apk/res/android"
    android:id="@+id/framelayout"
    android:layout_width="match_parent"
    android:layout_height="match_parent"
    android:layout_gravity="center"
    android:foregroundGravity="fill"
    android:foreground="#e9d1ac29">

<LinearLayout
  android:orientation="vertical"
    android:layout_width="wrap_content"
    android:layout_height="wrap_content">

<ImageView
    android:layout_width="200dp"
    android:layout_height="200dp"
    android:layout_marginBottom="10dp"
    android:src="@drawable/ic_android_black_24dp"
    android:scaleType="centerCrop"/>

<TextView
    android:layout_width="match_parent"
    android:layout_height="wrap_content"
    android:textSize="50sp"
    android:gravity="center_horizontal"
    android:text="GagAcademy"/>

</LinearLayout>

</FrameLayout>
الخرج :
ملاحظة
عند تطبيق هذه الخاصية ستكون العناصر التي تكون دخل المخطط الاطاري في الخلفية ويتم وضع foreground في المقدمة ويمكن إعطاء بعض الخواص مثل اللون او حتي صور
3. android:foregroundGravity
هذه الخاصية تمثل موضع foreground في المخطط ويمكن أعطاءها بعض القيم مثل “top”, ”center_vertical” , ”fill_vertical”, ”center_horizontal”, ”fill_horizontal”, ”center”, ”fill”, ”clip_vertical”, ”clip_horizontal”, ”bottom”, ”left” or ”right” وتكون القيمة الافتراضية هي fill.المثال بالاعلي يحتوي علي هذه الخاصية ايضا.
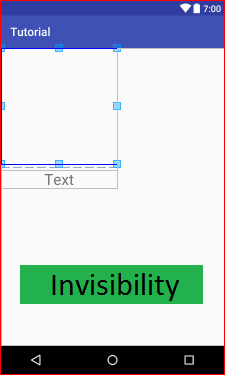
4. android:visibility
هذه الخاصية تقبل ثلاثة قيم فقط وهي visible, invisible or gone.visible –the view is present and also visible العرض موجود ومرئي أيضا
invisible –The view is present but not visible العرض موجود وغيرمرئي
gone –The view is neither present nor visiblebe العرض غير موجود ولا مرئي
5. android:measureAllChildren
هذا يحدد ما إذا كان سيتم قياس جميع العناصر التابعة بما في ذلك رؤية الحالة المرتدة أو تلك الموجودة في الحالة المرئية أو غير المرئية لقياس الرؤية. القيمة الافتراضية لـ measureallchildren خاطئة. يمكننا تعيين قيم في شكل Boolean بمعنى "true" أو "false".ملاحظة
أذا تم تعين القيمة true سيعرض كل من الطول والعرض لمخطط الاطاري حتي إذا كانت قيمة العرض gone
<?xml version="1.0" encoding="utf-8"?>
<FrameLayout
xmlns:android="http://schemas.android.com/apk/res/android"
    android:id="@+id/frame"
    android:orientation="vertical" android:layout_width="wrap_content"
    android:layout_height="wrap_content"
    android:measureAllChildren="true">

  <ImageView
        android:layout_width="wrap_content"
        android:layout_height="wrap_content"
        android:visibility="gone"
        android:src="@drawable/ic_launcher"/>

</FrameLayout>
public class MainActivity extends Activity {
    @Override
    protected void onCreate(Bundle savedInstanceState) {
        super.onCreate(savedInstanceState);
        setContentView(R.layout.demo);
        FrameLayout frame=(FrameLayout)findViewById(R.id.frame);
        frame.measure(View.MeasureSpec.UNSPECIFIED, View.MeasureSpec.UNSPECIFIED);
        int width = frame.getMeasuredWidth();
        int height = frame.getMeasuredHeight();
Toast.makeText(getApplicationContext(),"width="+width+"height="+height,Toast.LENGTH_SHORT).show();

    }
}
مثال تطبيقي علي المخطط الاطاري :
Step 1: Create a new project in Android Studio and name it FrameTesting. (Select File -> New -> New Project. Fill the forms and click “Finish” button)
Step 2: Now Open res -> layout -> activity_main.xml and add the following code. Here we are putting different TextView in Frame Layout.
<?xml version="1.0" encoding="utf-8"?>
<FrameLayout
    xmlns:android="http://schemas.android.com/apk/res/android"
   android:layout_margin="20dp"
 android:layout_height="match_parent"
    android:layout_width="match_parent">

 <TextView
        android:text="LeftTop"
        android:layout_width="wrap_content"
        android:layout_height="wrap_content" />

 <TextView
        android:layout_height="wrap_content"
        android:layout_width="wrap_content"
        android:text="RightTop"
        android:layout_gravity="top|right" />

 <TextView
        android:layout_height="wrap_content"
        android:layout_width="wrap_content"
        android:text="CentreTop"
        android:layout_gravity="top|center_horizontal" />

 <TextView
        android:text="Left"
        android:layout_gravity="left|center_vertical"
        android:layout_width="wrap_content"
        android:layout_height="wrap_content" />

 <TextView
        android:layout_height="wrap_content"
        android:layout_width="wrap_content"
        android:text="Right"
        android:layout_gravity="right|center_vertical" />

 <TextView
        android:layout_height="wrap_content"
        android:layout_width="wrap_content"
        android:text="Centre"
        android:layout_gravity="center" />

 <TextView
        android:text="LeftBottom"
        android:layout_gravity="left|bottom"
        android:layout_width="wrap_content"
        android:layout_height="wrap_content" />

 <TextView
        android:layout_height="wrap_content"
        android:layout_width="wrap_content"
        android:text="RightBottom"
        android:layout_gravity="right|bottom" />

 <TextView
        android:layout_height="wrap_content"
        android:layout_width="wrap_content"
        android:text="CenterBottom"
        android:layout_gravity="center|bottom" />
</FrameLayout>
Step 3: Let the MainActivity.java has default Android code or add the below code:
package tutorial.com.frametesting;

import android.support.v7.app.AppCompatActivity;
import android.os.Bundle;

public class MainActivity extends AppCompatActivity {

    @Override
    protected void onCreate(Bundle savedInstanceState) {
        super.onCreate(savedInstanceState);
        setContentView(R.layout.activity_main);
    }
}


ليست هناك تعليقات:
إرسال تعليق
ملحوظة: يمكن لأعضاء المدونة فقط إرسال تعليق.